Recently, we’ve discovered a very, very simple way of making your own cardboard, hard-wearing StoryCubes, using only:
- A free bookleteer account
If you haven’t signed up for a free bookleteer account yet, do so here.
- A4 single label paper, suitable for Inkjet or Laserjet printers
Full sheet label paper, available from any decent stationers (Avery code: DSP01).
- Blank StoryCubes
Read about StoryCubes, and order blank packs here.
Firstly, design your StoryCube.
Sign into bookleteer. If you’re a new user, read the help page.
Design your cube using the bookleteer templates, export the file as a PDF, then upload to the Create A StoryCube page, or upload each image individually.
Select Generate StoryCube and download the file, from the top right corner of the screen.
Next, print and make.
Print using the label paper, and cut around around only the faces of the cube, not the tabs – it should look a crucifix (You can also protect your cube by using adhesive cellophane, by affixing a layer on top of the label sheet, then cutting out).
 Peel off the backing paper, and stick onto a blank cube.
 Fold your StoryCube, and voila!

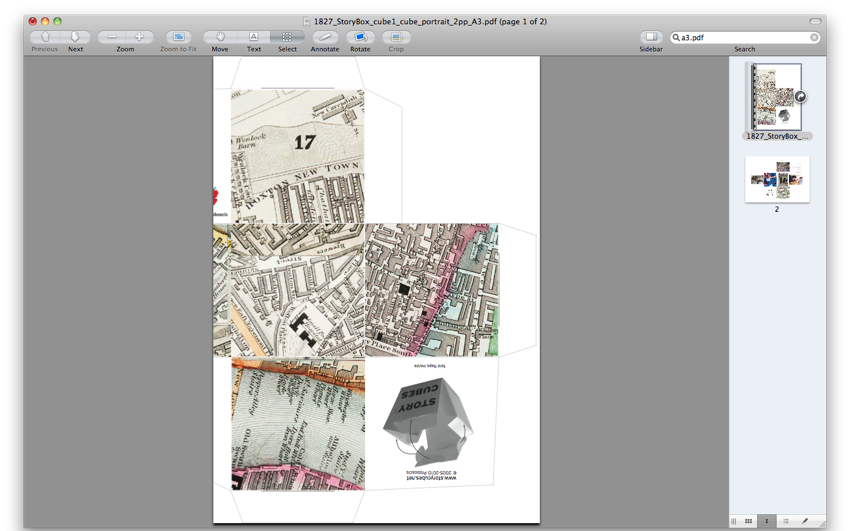
You can even use this method to make your own A3 size StoryCubes, without even owning an A3 printer.
Simply crop the A3 cube PDF into two documents, so that it can be printed across two sheets of A4 paper.


Then, cut out the two segments as shown, to form a two-part crucifix shape.
 Stick onto to a blank A3 cube and fold…

 … and you now have an A3 cube, using a standard home printer.
If any bookleteers discover more clever ways to make StoryCubes, do share!
2 replies on “Easy peasy way of making A4 & A3 StoryCubes on any printer”
[…] Tagiuri has written a detailed, illustrated post about how to do this over on the bookleteer […]
[…] super easy to create storycube layouts with bookleteer and print them onto sticker sheets which can be cut out and stuck onto the pre-cut and scored card […]